This article provides step-by-step instructions for event producers looking to leverage Bear IQ to maximize event ROI by creating targeted marketing lists. With access to attendee data, users can generate specific lists used for marketing campaigns, ensuring effective reach and communication. This process will help in refining your audience and tailoring your marketing efforts according to specific criteria. Before getting started, ensure you have access to the Bear IQ platform and understand its basic navigation.
Tip: Utilize the Audience Viewer to quickly segment your attendees based on key criteria for a more effective campaign.
Key Moments to look out for:
-
Navigating to the Marketing Module
-
Applying filters effectively
-
Exporting in the correct format
Heads up: Ensure your selected filters align closely with your campaign objectives to maximize the impact of your targeted marketing list.
Step-by-Step Instructions
Step 01: Log into Our Business Intelligence Platform
Begin by logging into the Bear IQ business intelligence platform. If you don't have an account, create one first. Once logged in, access the dashboard that displays all available modules.
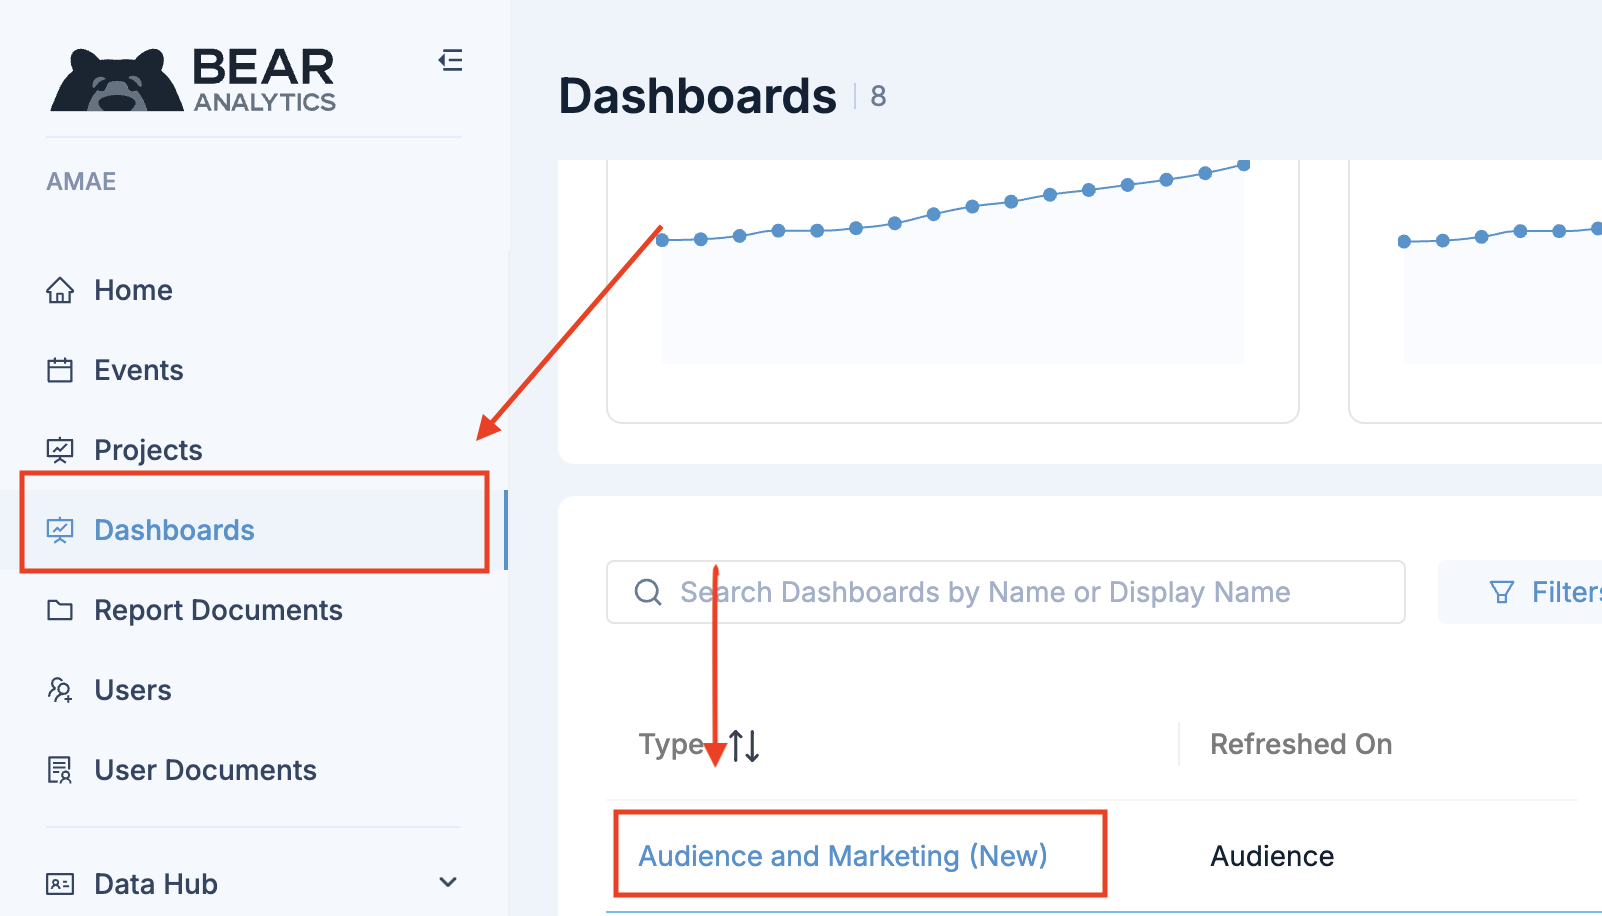
Step 2: Navigate to the Marketing Module
On the left side of the platform, find the tab labeled "Dashboards" and click on it to enter the Marketing Module.
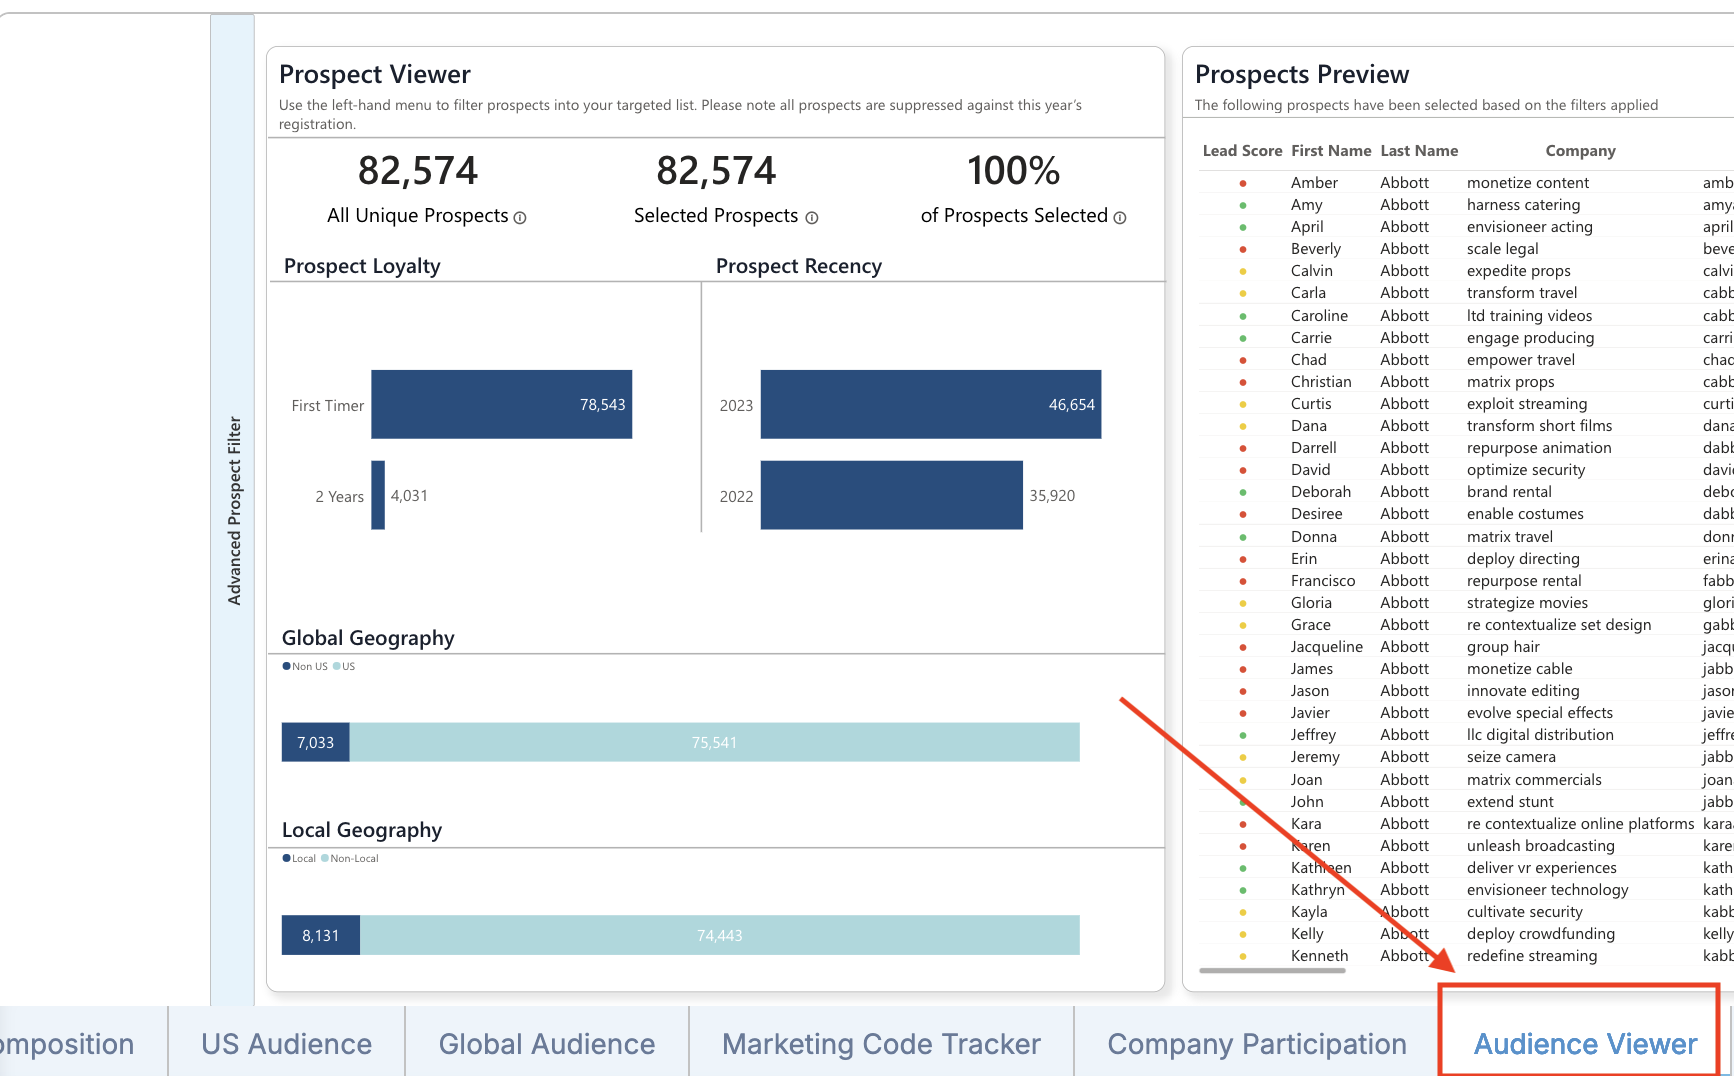
Step 3: Access the Audience Viewer
Navigate to the bottom of your module to find the Audience Viewer, where you can apply filters to narrow your audience down to a targeted list.
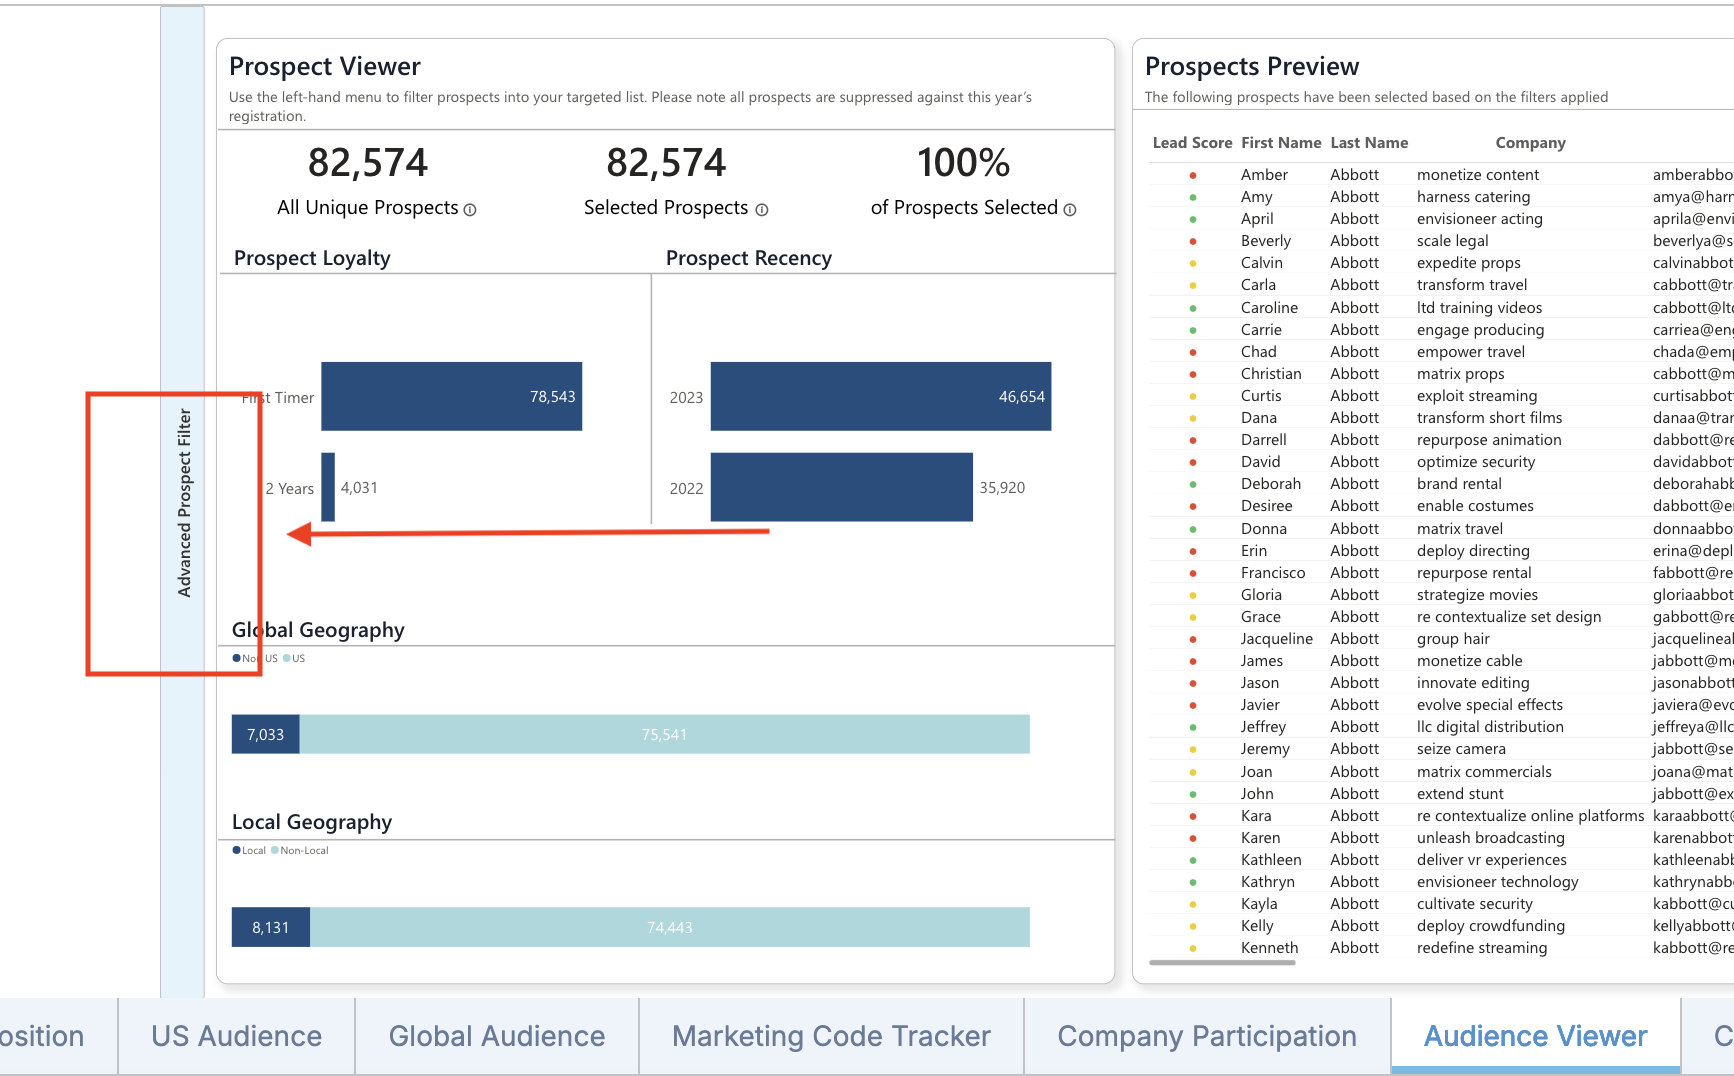
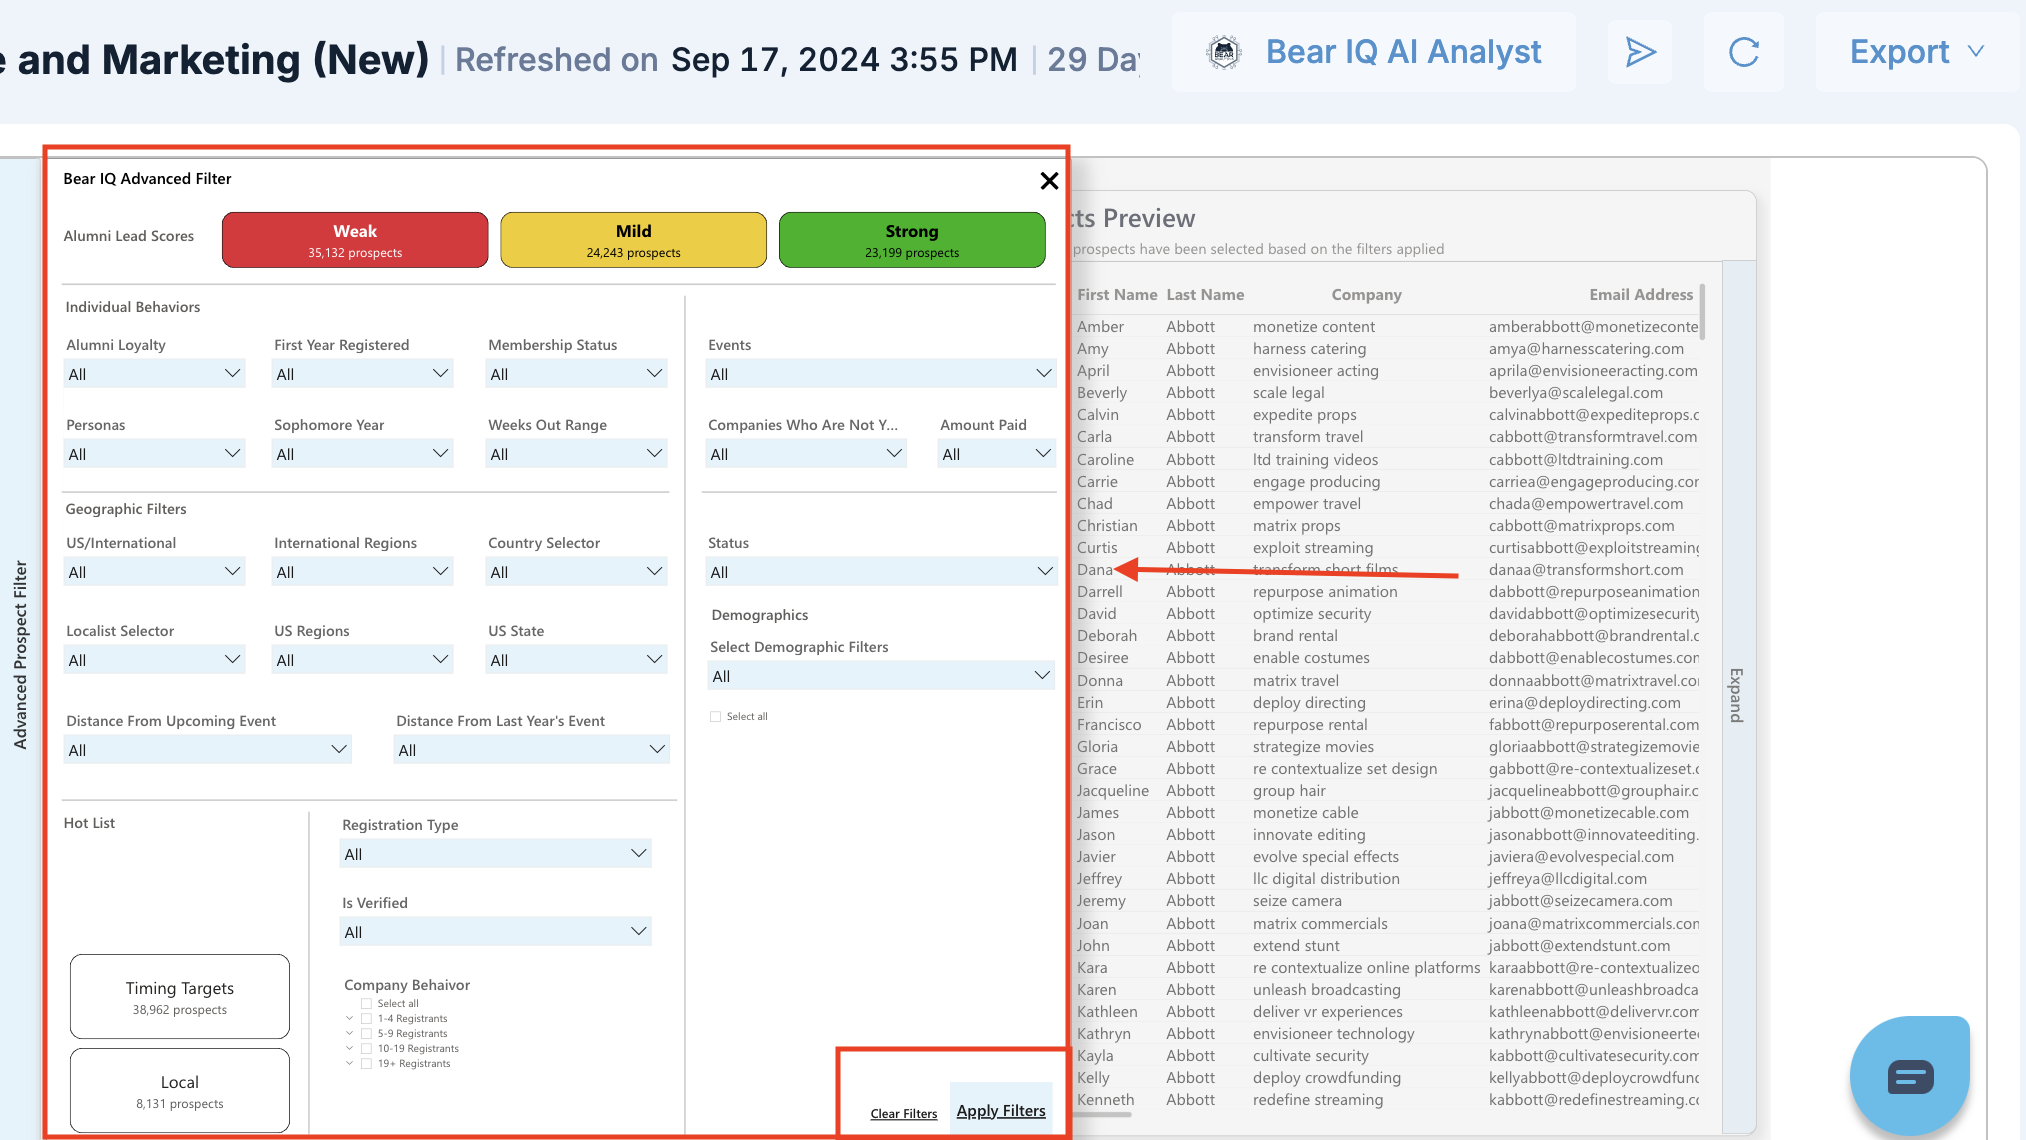
Step 4: Apply Filters
Use the filtering options in the Audience Viewer to refine your list. Filters can include demographic data, attendee behavior, interests, among others. Test different filters until you achieve a list that fits your marketing needs.
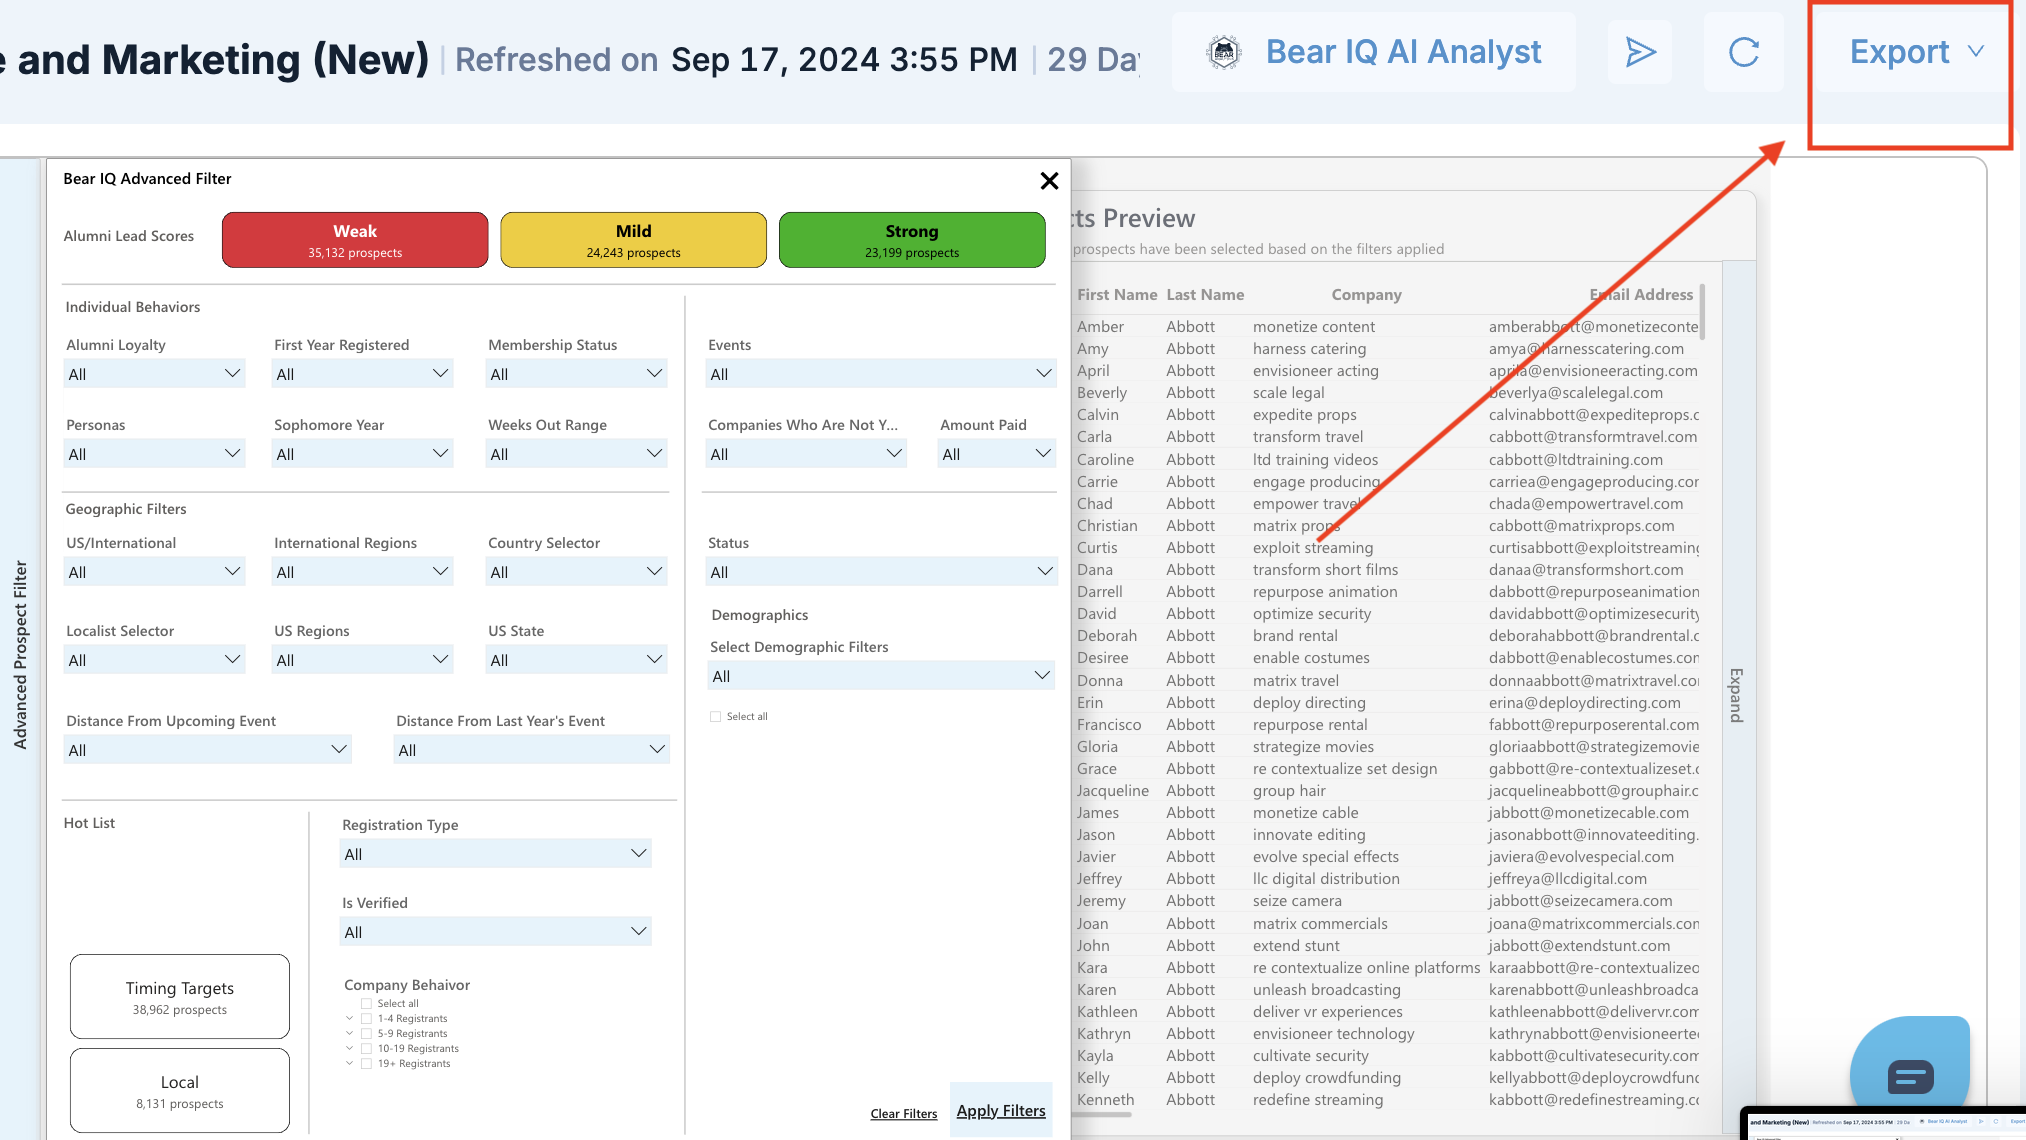
Step 5: Export the Contact List
Once satisfied with the targeted list, click on the blue "Export" dropdown and then the three grey dots in your contact box. This will provide a dropdown menu; select "Export data."
Step 6: Choose the Export Format
A pop-up window will appear asking for your preferred export format. Choose the format that fits your requirements and click "Export."
Step 7: Download the Contact List
The file will download to your computer, ready for upload into any marketing technology you use.
By following these steps, you can efficiently create a targeted marketing list using Bear IQ, optimizing your event marketing campaigns for success.