Exporting Bear IQ Data to Your Email Platform
This article provides instructions on how to seamlessly export data from Bear IQ to your preferred email marketing platform, such as Mailchimp. This process is essential for targeted email campaigns, audience segmentation, and efficient communication management. Before starting, ensure you have access to Bear IQ and your chosen email platform, and familiarize yourself with your audience data.
Tip: Use Advanced Filters to quickly segment your audience before exporting.
Key moments to look out for:
Using Advanced Filters to segment your audience
Selecting the appropriate export tool
Heads up: Make sure your tool is on the supported export list
Step-by-Step Instructions
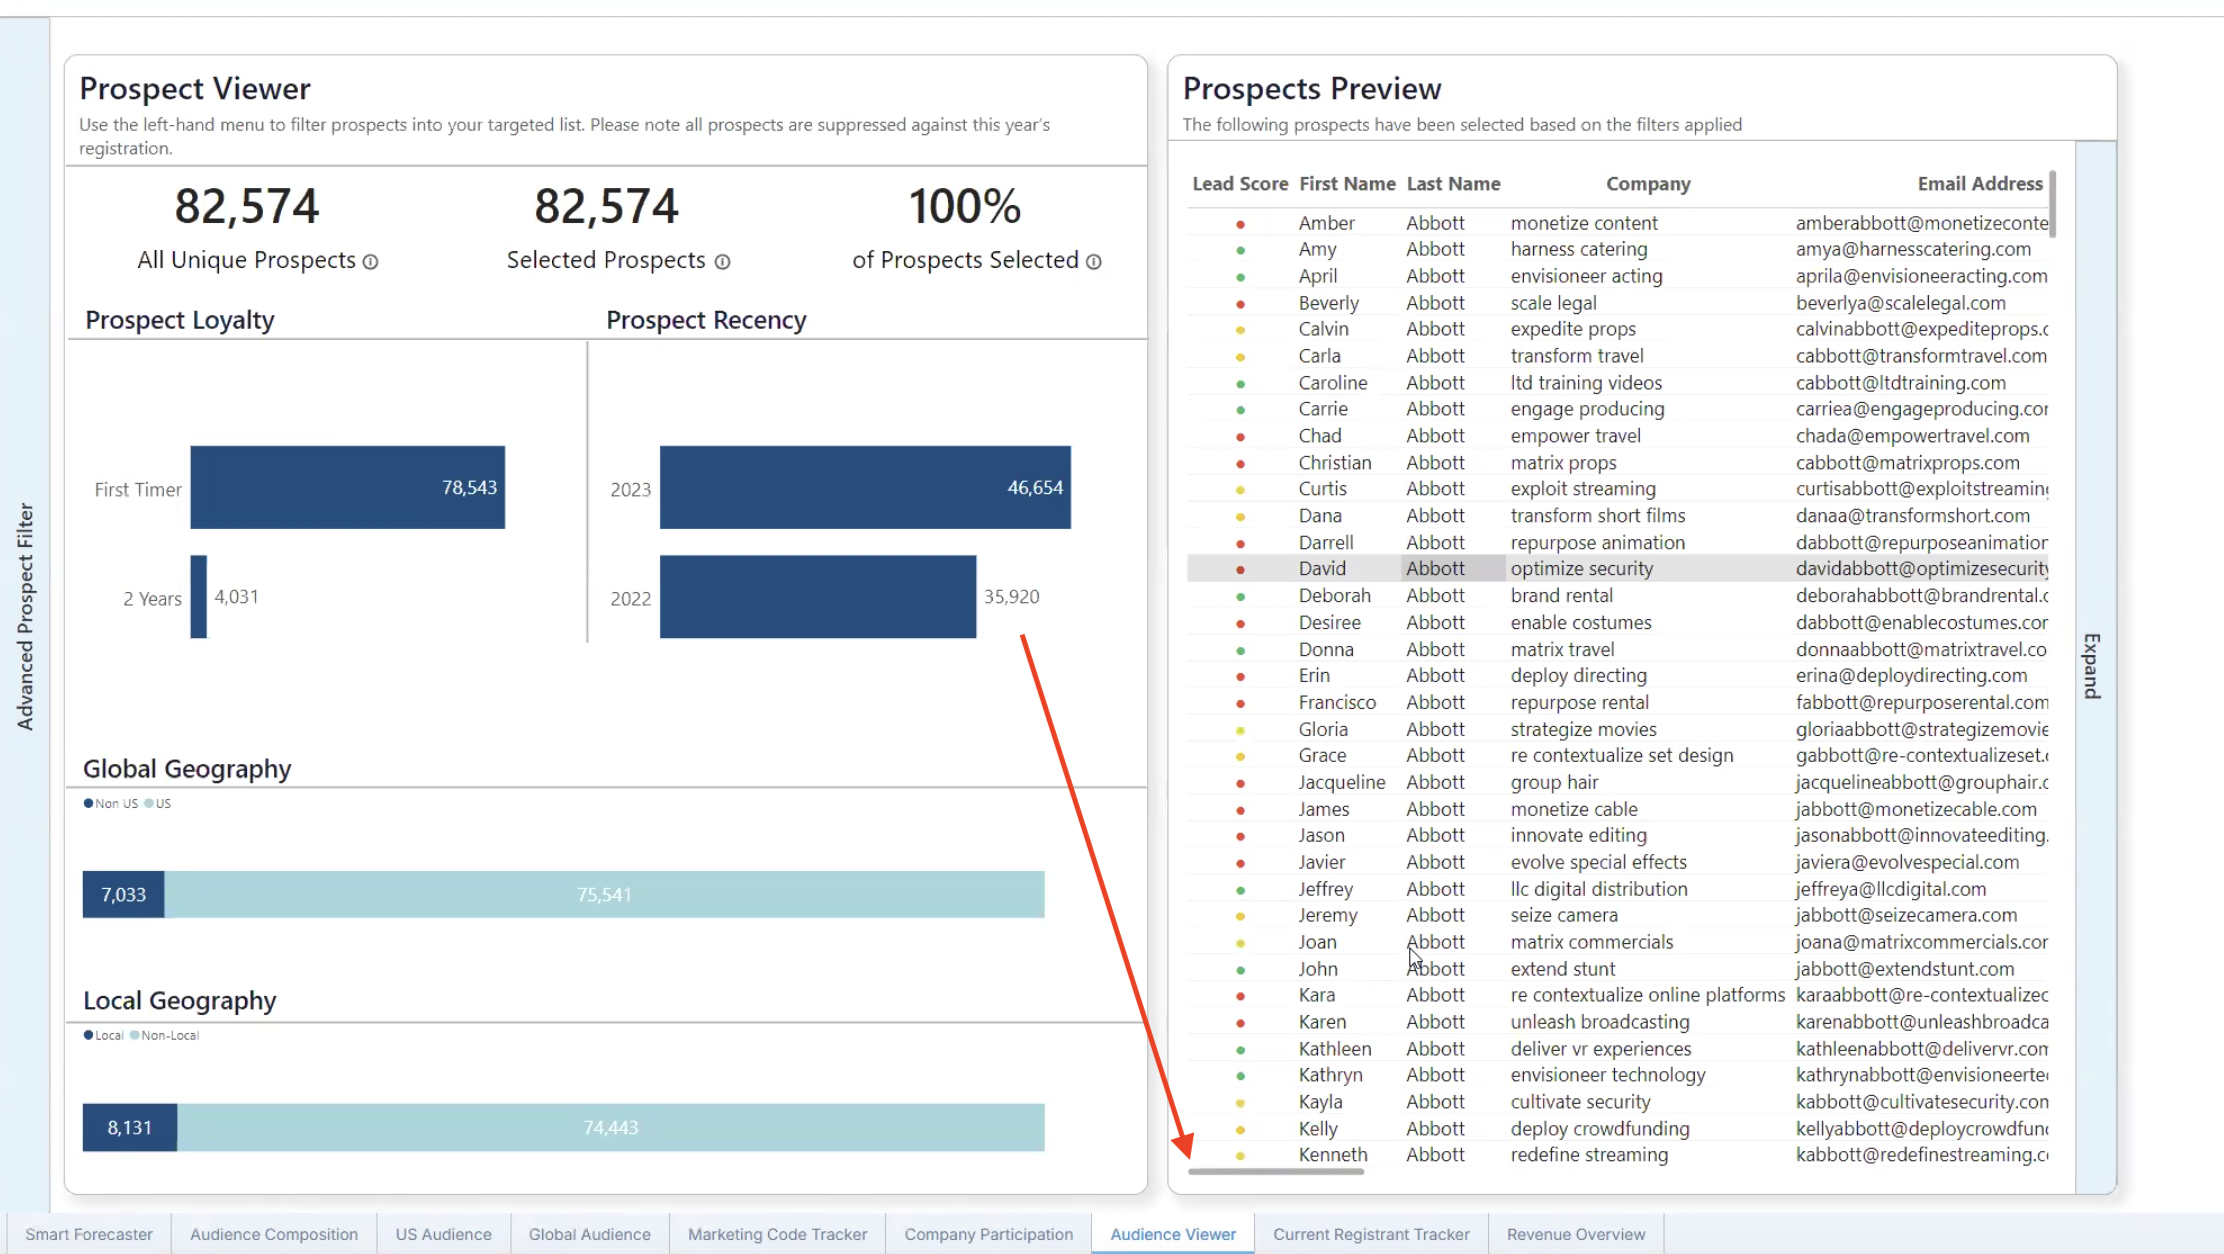
Step 01: Go to the Audience Viewer Tab in the Audience Module
Open Bear IQ and navigate to the Audience Module, then locate the Audience Viewer tab near the bottom of the screen.

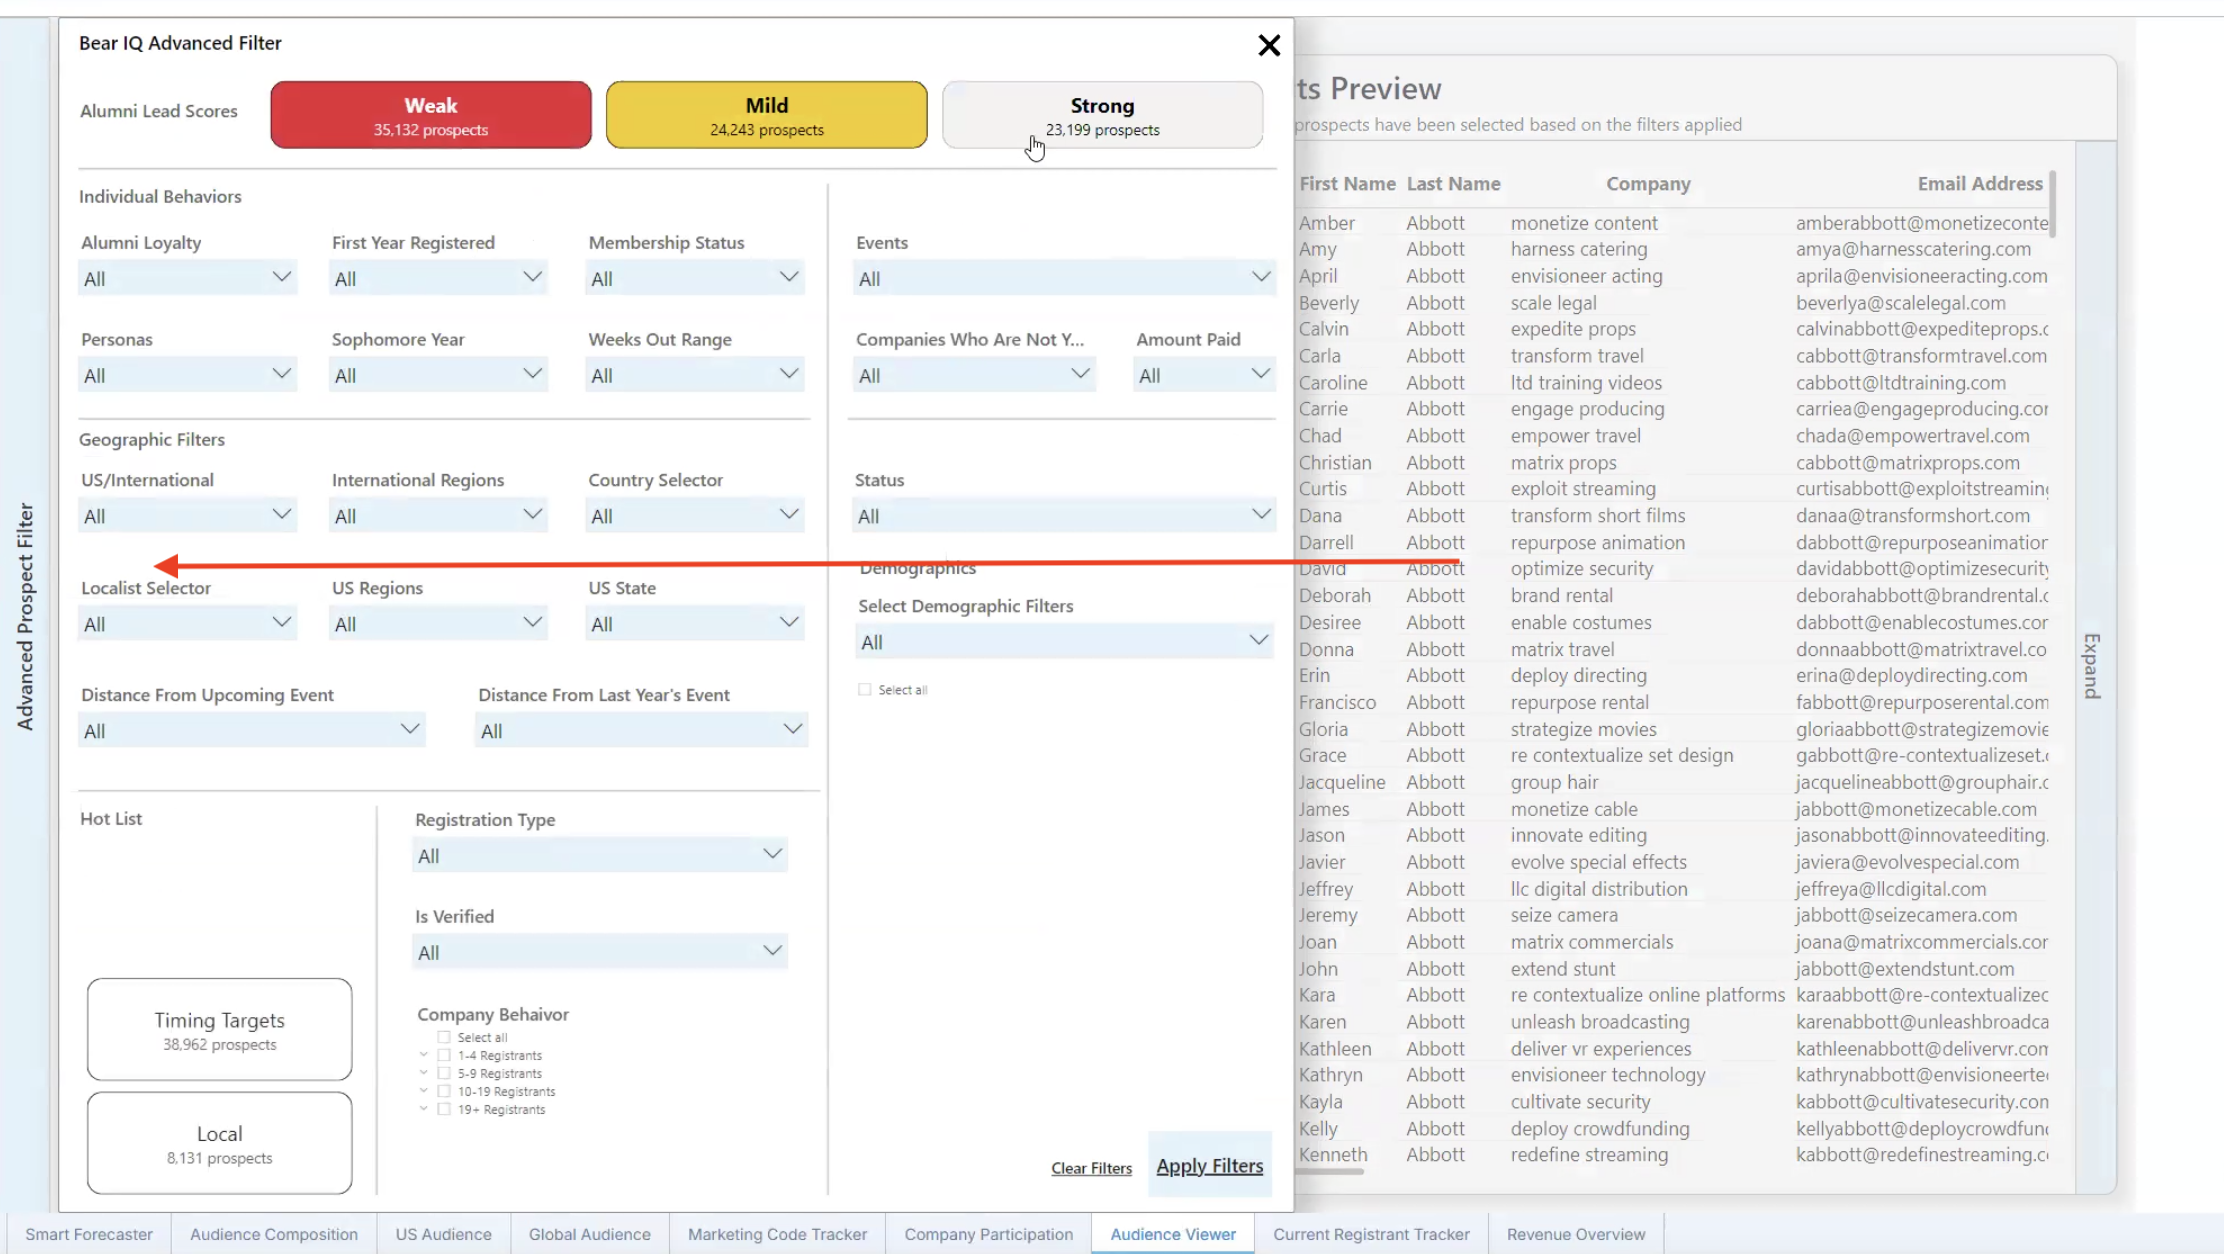
Step 02: Utilize Advanced Filters to Specify Your Audience
On the left-hand side of the screen, click on Advanced Filters. Use these filters to segment and select the specific audience you wish to export.

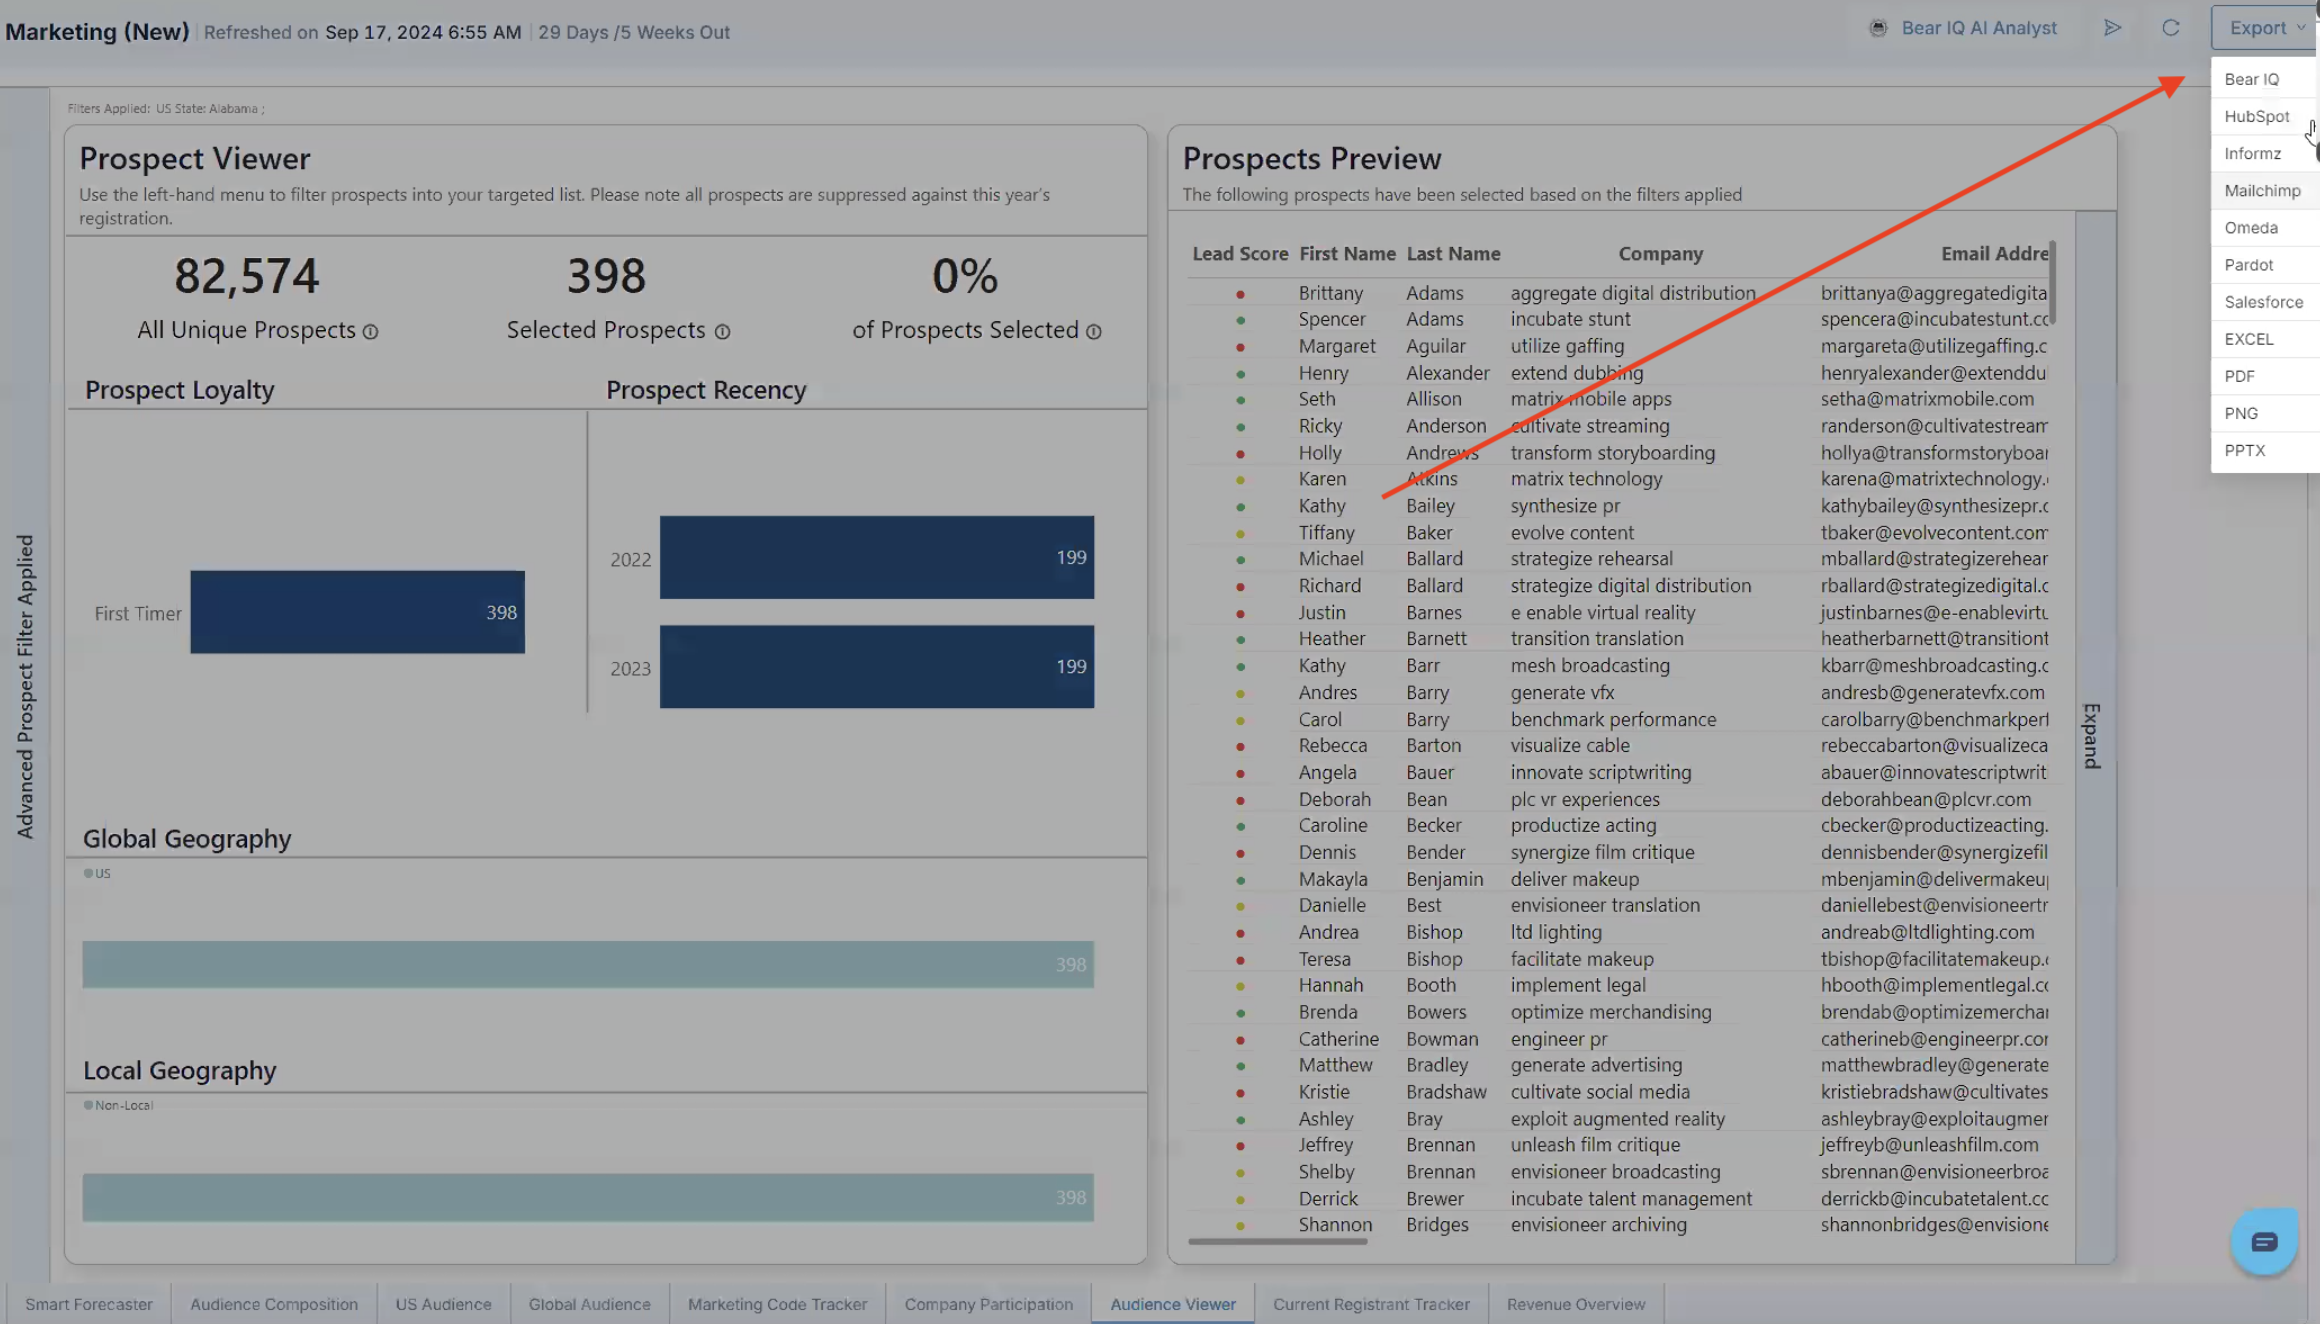
Step 03: Initiate the Export Process
Once you have filtered and selected your audience, click the Export button located in the top right corner of the screen. Choose your desired email platform (e.g., Mailchimp) from the list.

Step 04: Map Fields in the Export Popup and Complete the Export
A popup window will appear asking you to map your Bear IQ audience fields to your email platform's fields. Carefully align each field as needed. After mapping the fields, click the Export button again to finalize and send your audience data to your selected email platform.
Following these steps will efficiently integrate your Bear IQ data with your email marketing efforts, facilitating targeted communication and enhanced campaign performance.
